This image is showing the Tree Topology Editor with the NJ tree for the Crab_rRNA.meg example file loaded.
The tree topology editor shows a single tree's topology in a way in which you are able to modify it. The toolset is very similar to the Tree Explorer , but with some features added and others removed.
The Topology Editor is also used during analyses in which the user is supplying their own tree. In some cases the taxa names in the supplied tree don’t match up exactly with the names in the sequence file we are using. In these cases users will have a chance to fix the inconsistency by mapping the sequence names to the tree names. Further below, how mapping names works is described.
Editing the Topology of a Tree
The most basic use of the Topology Editor is to enable the user to build or edit a tree file. The editor can be launched from the main form by clicking User Tree->Edit/Draw Tree (Manually). If you don’t have a tree file to start off with then you can choose to either start from scratch or start with a randomly created tree based on your sequence file (this just saves the time of adding the taxa).
This image is showing
the Tree Topology Editor with the NJ tree for the Crab_rRNA.meg example
file loaded.
Toolbar Explained
 - Open
a newick tree file
- Open
a newick tree file
 - Open
a recently edited tree. This is especially useful in the
case where you have a tree file which doesn’t completely match a sequence
file. If you have to resolve the differences MEGA remembers
the tree and the mapping of the taxa. Just select the recently
edited tree next time you need to use it with that sequence file.
- Open
a recently edited tree. This is especially useful in the
case where you have a tree file which doesn’t completely match a sequence
file. If you have to resolve the differences MEGA remembers
the tree and the mapping of the taxa. Just select the recently
edited tree next time you need to use it with that sequence file.
 - Generate a new tree.
 -
Save to newick file format
-
Save to newick file format
 -
Change the taxa font
-
Change the taxa font
 - Search
for a taxa by name
- Search
for a taxa by name
 -
Copy an image of the tree to the clipboard (you can past a picture of
the tree into word, or another program)
-
Copy an image of the tree to the clipboard (you can past a picture of
the tree into word, or another program)
 -
Undo the last change (only applies to topology changes, not taxa name
changes)
-
Undo the last change (only applies to topology changes, not taxa name
changes)
 - Add
a new taxa (adds on the currently selected branch, or if
no branch is selected it adds to the very top subtree)
- Add
a new taxa (adds on the currently selected branch, or if
no branch is selected it adds to the very top subtree)
 -
Delete a taxon (If a taxon is selected it will be drawn in blue, and this
option will become enabled. To select a taxa simply click it’s
name once.)
-
Delete a taxon (If a taxon is selected it will be drawn in blue, and this
option will become enabled. To select a taxa simply click it’s
name once.)
 - Place
root at selected branch or node
- Place
root at selected branch or node
 -
Swap
branches of a subtree
-
Swap
branches of a subtree
 -
Resize tree to fit the window. This is especially useful with
large trees.
-
Resize tree to fit the window. This is especially useful with
large trees.
 -
Resize the tree by dragging (select this option, then click and drag on
the tree to resize it) Some larger trees will take longer to
resize simply because of their size.
-
Resize the tree by dragging (select this option, then click and drag on
the tree to resize it) Some larger trees will take longer to
resize simply because of their size.
Resolving taxa name discrepancies between a tree and a sequence file
Some analyses in MEGA will require you to specify a tree file. The tree should be a tree representative of the sequence data, or at least contain the sequence names as taxa names in it. If the tree taxa names and the sequence data names don’t match perfectly or the tree is the wrong size then you are given a chance to resolve these discrepancies. The following is an example of creating an ML tree with an initial tree which doesn’t match the sequence names.
We first specify a tree file
in the analysis preferences
Next we are told that there is a Taxa Name Mismatch and we are asked how we would like to resolve this. One option is Automatic Tree which if chosen would simply have MEGA construct a neighbor-joining tree to use as a starting point for the heuristic search. Instead, select Use Topology Editor so that MEGA will display the Tree Topology Editor

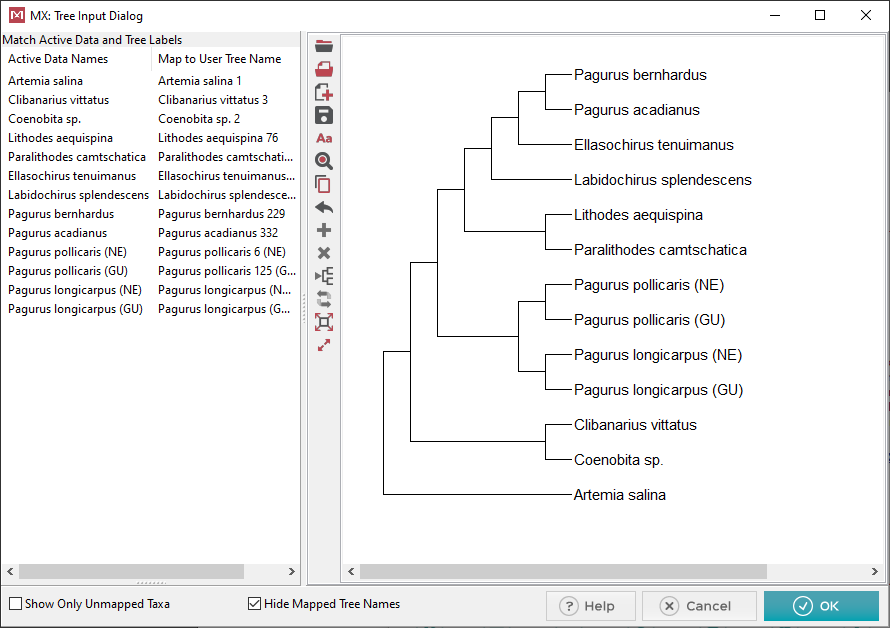
This is the dialog where we will map
the taxa names from our sequence data file onto the tree. It’s
important to remember that the tree must have the same # of taxa as your
sequence data. We will call the sequence data names Active
Data Names. In this example there is 1 extra taxon which
will need to be removed at the end.
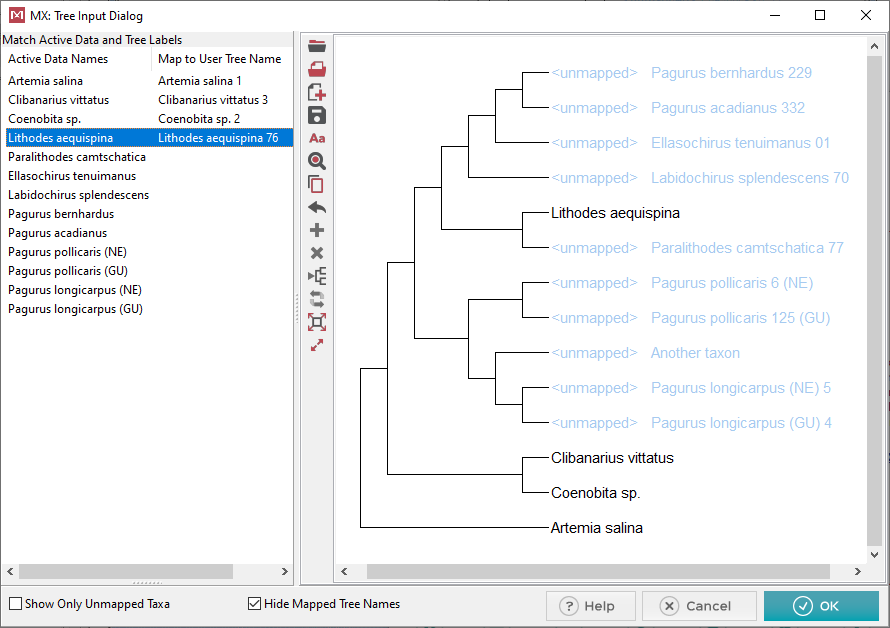
At this point 4 of the 13 taxa have been mapped. Notice that
on the left hand side when a taxon has been mapped it has an entry associated
with it under the Map to User Tree Name
column. Mapped taxa also show up in the tree with black text,
and no longer say
There are two ways to map an
active data name to a tree name. The first is simply dragging
the active data name from the left hand side (by clicking and dragging)
and dropping it on the tree over the tree name you would like to map it
to.
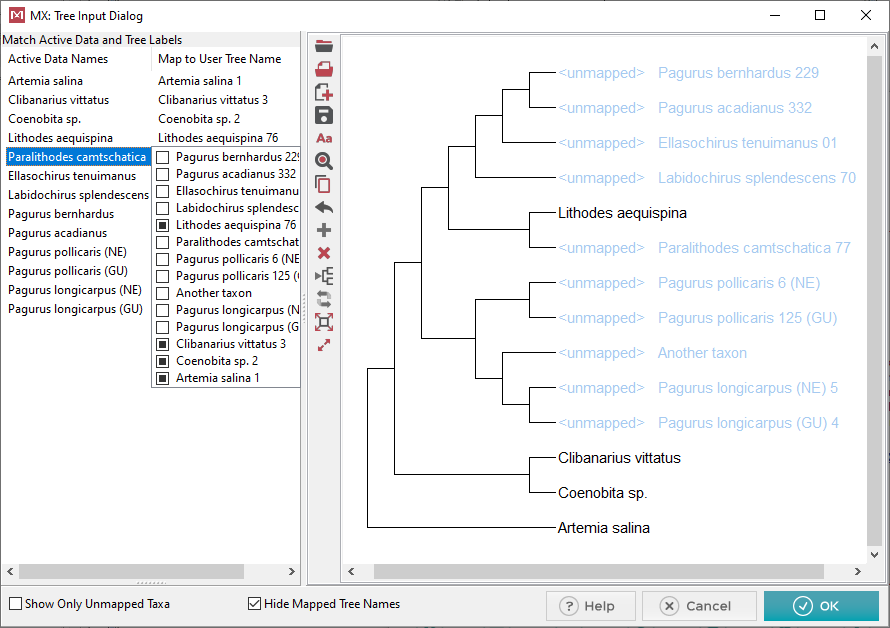
The second way to map taxa is to click on the space in the Map
to User Tree Name which across from the Active
Data Name you wish to map. This will bring up a selection
box where you can click the tree name you want to associate with it. Below
is a screen shot of the second method.
We will now map the rest of the taxa.

Noticde that one taxon on the tree which isn’t mapped, but no “Active data
Names” to map to it. This is an extra taxon in the tree, and
we will delete it. Simply right click on the name and select
Remove OTU.
Our mapping process is now complete! Click the “OK” button. If you are going to be using this tree file and data set for a number of analyses, you may want to note the “Recent Trees” feature, which keeps track of these associations. Next time you will just find the tree under “recent trees” and be done.